So, you’ve realized your dishwasher isn’t heating up properly, huh? Yeah, it happens. The heating element in your dishwasher is kind of like the heart of the machine—if it’s not working, nothing else is gonna function right. Replacing it might sound intimidating, but trust me, it’s totally doable. In this guide, we’ll walk you through every step, from diagnosing the problem to swapping out that faulty heating element. By the end of it, you’ll be patting yourself on the back for saving big bucks on repair costs.
Listen, a broken heating element doesn’t just mean your dishes aren’t getting hot water; it also means they’re not drying properly. And who wants to hand-dry every single plate after running the dishwasher? Not me, and definitely not you. So, let’s dive into how you can fix this issue once and for all without calling in an expensive technician.
Before we get started, I want to emphasize that replacing a heating element isn’t rocket science. With the right tools, some patience, and this guide, you’ll have your dishwasher back in business in no time. Let’s roll up our sleeves and get to work!
Read also:Unveiling The Truth About Telegram Incest What You Need To Know
Understanding the Dishwasher Heating Element
Alright, before we jump into replacing the heating element, let’s take a minute to understand what exactly it does. The heating element is basically the part of your dishwasher that heats the water so it can clean and sanitize your dishes effectively. Without it, you’re stuck with lukewarm water that doesn’t cut through grease or grime.
Here’s the deal: if your dishwasher isn’t drying properly or the water feels cold, there’s a good chance the heating element has gone kaput. Don’t worry, though—it’s one of the easier parts to replace, especially if you follow these steps carefully.
Common Signs Your Heating Element Needs Replacement
Now, how do you know for sure that the heating element is the culprit behind your dishwasher woes? Here are a few red flags to watch out for:
- Your dishes come out cold and wet even after a full cycle.
- The drying function doesn’t seem to work at all.
- You notice a burnt smell coming from the dishwasher.
- There’s visible damage to the heating element, like cracks or corrosion.
If any of these sound familiar, chances are your heating element needs a replacement. But don’t just assume—you’ll want to confirm the diagnosis before diving into the repair process.
How to Diagnose a Faulty Heating Element
Before you go buying a new heating element, it’s important to make sure that’s really the problem. Sometimes, other components in the dishwasher can cause similar issues, so let’s run through a quick checklist to rule them out.
Step 1: Check the Thermostat
The thermostat controls the temperature of the water in your dishwasher. If it’s malfunctioning, it could give the illusion that the heating element is broken when it’s actually fine. To check the thermostat:
Read also:Tim Cook Husband The Man Behind Apples Ceo
- Locate the thermostat inside the dishwasher (usually near the heating element).
- Use a multimeter to test for continuity. If there’s no continuity, the thermostat might need replacement.
Pro tip: Make sure the dishwasher is unplugged before you start messing around with electrical components!
Step 2: Inspect the Heating Element Visually
Once you’ve ruled out the thermostat, it’s time to take a closer look at the heating element itself. Here’s what you need to do:
- Unplug the dishwasher from the power source.
- Remove the bottom rack to access the heating element.
- Look for signs of damage, such as cracks, burn marks, or corrosion.
If the heating element looks sketchy, it’s probably time to replace it. But don’t just rely on visuals—let’s double-check with a multimeter next.
Gathering the Right Tools and Materials
Okay, so you’ve confirmed that the heating element is indeed the problem. Now it’s time to gather everything you’ll need for the replacement. Here’s a list of tools and materials to have on hand:
- A new heating element (make sure it matches your dishwasher model).
- A screwdriver (Phillips or flathead, depending on your dishwasher).
- A wrench or socket set for removing bolts.
- A multimeter to test the old heating element.
- A pair of gloves to protect your hands from sharp edges.
Pro tip: If you’re not sure which heating element to buy, check your dishwasher’s manual or look up the model number online. Compatibility is key here!
Step-by-Step Guide to Replacing the Heating Element
Now that you’ve got all your tools ready, let’s dive into the actual replacement process. Follow these steps carefully to ensure a smooth and successful repair.
Step 1: Unplug the Dishwasher
Safety first, folks! Before you start tinkering with anything electrical, make sure your dishwasher is completely unplugged from the power source. You don’t want to risk getting zapped while you’re working.
Step 2: Remove the Bottom Rack
Next, take out the bottom rack of the dishwasher to give yourself better access to the heating element. This should be pretty straightforward—just lift it out gently and set it aside.
Step 3: Test the Old Heating Element
Before you remove the old heating element, use your multimeter to test it for continuity. Here’s how:
- Set your multimeter to the lowest ohms setting.
- Touch the probes to the terminals on the heating element.
- If the multimeter doesn’t show continuity, the heating element is definitely fried.
Pro tip: Take a picture of the wiring setup before you disconnect anything. It’ll make reassembly a lot easier later on.
Step 4: Disconnect the Wiring
Once you’ve confirmed the heating element is bad, it’s time to remove it. Start by disconnecting the wiring. Carefully unscrew the terminals and set the wires aside.
Step 5: Remove the Old Heating Element
Now, use your wrench or socket set to remove the bolts holding the heating element in place. Gently pull it out, being careful not to damage the surrounding components.
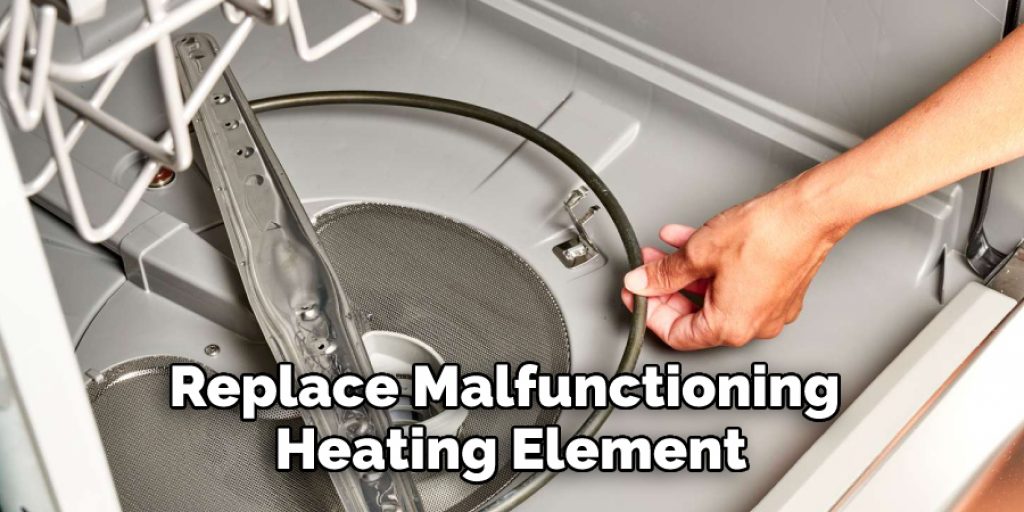
Step 6: Install the New Heating Element
With the old heating element out of the way, it’s time to install the new one. Follow these steps:
- Position the new heating element in place and secure it with the bolts.
- Reconnect the wires to the terminals, making sure they’re snug but not overtightened.
Pro tip: Double-check all connections before moving on to the next step. Loose wires can cause big problems later!
Step 7: Reassemble the Dishwasher
Almost done! Now it’s time to put everything back together. Replace the bottom rack, plug the dishwasher back in, and run a test cycle to make sure everything’s working properly.
Troubleshooting Common Issues
Even after replacing the heating element, you might run into a few hiccups. Here are some common issues and how to fix them:
Issue 1: Dishwasher Still Not Heating
If your dishwasher still isn’t heating up after replacing the heating element, there could be a few reasons:
- The new heating element might be defective—try testing it with a multimeter.
- There could be an issue with the wiring or connections—double-check everything is secure.
Issue 2: Dishes Aren’t Drying Properly
Even with a new heating element, your dishes might still not be drying as expected. This could be due to:
- A faulty drying fan or vent system.
- Blocked air vents or filters.
Pro tip: Regular maintenance, like cleaning the filters and vents, can prevent drying issues in the future.
Cost Comparison: DIY vs Professional Repair
Let’s talk money, shall we? Replacing a heating element yourself is a lot cheaper than hiring a professional technician. Here’s a quick breakdown:
- DIY Cost: Around $20-$50 for the heating element and tools.
- Professional Cost: Anywhere from $150-$300, depending on labor charges.
Not only are you saving cash by doing it yourself, but you’re also gaining valuable skills that could come in handy for future repairs.
Maintaining Your Dishwasher for Longer Lifespan
Replacing the heating element is just one piece of the puzzle when it comes to keeping your dishwasher in tip-top shape. Here are a few tips for maintaining your dishwasher:
- Clean the filters regularly to prevent clogs.
- Run a vinegar and baking soda cleaning cycle every few months.
- Avoid overloading the dishwasher, as it can strain the motor and other components.
By taking care of your dishwasher, you’ll extend its lifespan and save yourself from unnecessary repairs down the road.
Conclusion
And there you have it—a comprehensive guide to replacing the heating element in your dishwasher. From diagnosing the problem to completing the repair, you now have all the knowledge and tools you need to tackle this job like a pro. Remember, saving money and gaining skills are just two of the many benefits of doing it yourself.
So, what are you waiting for? Grab your tools, follow the steps, and get that dishwasher back in working order. And don’t forget to share this guide with your friends who might be dealing with the same issue. Together, we can conquer those pesky household repairs!
Table of Contents:
- Understanding the Dishwasher Heating Element
- How to Diagnose a Faulty Heating Element
- Gathering the Right Tools and Materials
- Step-by-Step Guide to Replacing the Heating Element
- Troubleshooting Common Issues
- Cost Comparison: DIY vs Professional Repair
- Maintaining Your Dishwasher for Longer Lifespan